Friday, December 30, 2011

Homeschool Spanish TOS Review

Photobucket


Photobucket 
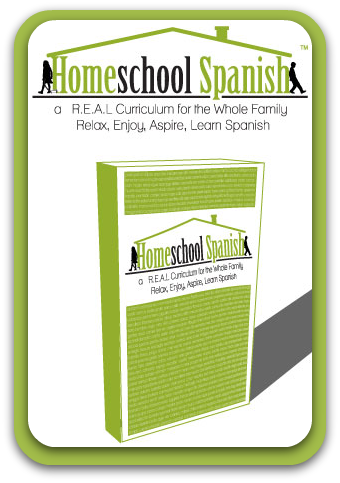
Homeschool Spanish is a complete Spanish curriculum for the entire family. The program currently available is geared to elementary ages with a high school supplement coming soon according to the website.

The Homeschool Spanish curriculum includes a textbook, workbook, answer book, and audio files. This bundle is available as a download ($49.95) or hard copy ($89.95) There is also a Daily Curriculum guide available for an additional cost with both of these bundles. The Daily Curriculum guide is not available separately, the bundle prices increase $10.00 if you wish to order it. Ordering is simple on the Homeschool Spanish website.


The audio files both introduce the vocabulary and phrases as well as the answers on many activities. The files are recorded by native Mexican Spanish speakers.

Homeschool Spanish is designed to incorporate foreign language lessons into daily life and lessons, something many homeschoolers have learned to do with multiple subjects.The curriculum uses listening, reading, writing, and speaking to fully teach the language. By emphasizing integration into daily life Homeschool Spanish makes learning Spanish like second nature and increases retention. There are 10 units with each unit containing 2-4 lessons or separate, but related vocabulary lists.

Vocabulary list topics include things like colors, numbers, family members, people, foods, body parts, clothes, transportation, places, months, days and seasons. Many of these are very appealing to and practical for children ( also practical for adults!)

Some of the more common activities suggested included keeping a journal in Spanish, making a board game, using puppets,or chalkboard type games and singing songs.Some of the more innovative ideas include using family pictures to practice people names, finding pictures in magazines to match with food or objects, or writing and illustrating their own comic strips.

There is not a lot of focus on grammar in the program, but each unit concludes with several pages explaining grammer related to that chapter.

Homeschool Spanishs' website provides many cultural website links so that in addition to learning the language students can get a peek into the Mexican Spanish culture.Topics included in the links are history, geography, people, animals, and just plain fun.

You can download samples of several of the curriculum here.

My Thoughts

Homeschool Spanish provides numerous ideas for games, activities, and personal interaction which aid learning and retention while making the process fun and less tedious and dry. By using so many different methods, this program easily works for students with many differing learning styles. There is something for the auditory, visual, and tactile learners. 

I love all the teacher support present in  Homeschool Spanish.  I know a lot of time and effort went into the writing and compiling. Even though I already use a planner, there isn't a whole lot of room to write down specifics of what I want to do. Using  Homeschool Spanish's Daily Curriculum guide for just this one subject I found plenty of innovative ideas for making learning fun and increasing retention. There is also a blank curriculum planning grid in the book which allows the user to write out their own plan of activities for a week.There is plenty of room for writing plans covering different concepts and activities related to the Spanish curriculum. I can very easily clip it over my planner page for the week and have a detailed plan for Spanish handy. By having a place to write down not only the text or written work I want accomplished each day as well as the websites to visit or special activities I find it so much easier to do creative things with my children. It was also easy to see if I had chosen a variety of activities.

I also like how simply and cleanly the book pages are laid out. There is a small heading at the top and then two separate columns featuring vocabulary and phrases with their English translation for the lesson. The bottom of the page has reminders to the instructor.

I do not know Spanish, so having the audio is a must for me.The audio answers are also great.  Not only can my children check their own work this way, but the proper pronunciation and inflection is reinforced.

I also love all the ideas for the extra, reinforcement activities for each lesson. For the lesson on colors I used a crayon of each of the colors in the lesson and had my children name the color in Spanish or they took turns asking for a crayon in a specific color in Spanish. 

One additional idea I came up with during our break was to check the collection of board books at our library for some covering the same concepts as we have had so far in REAL Homeschool Spanish. Board books generally have shorter sentences of present concepts singularly so they would be easier to read for a beginning language student than a longer book.

My 10 year old daughter appreciates that the program is not for little kids. She likes not having cartoon characters or cutesy pages. She enjoyed the written activity and puzzle pages. She liked the variety in these pages. They do not feature the same puzzles and written games each lesson.

My 7 year old used the program and enjoyed the audio portions, games or activities, and the cultural studies but was easily overwhelmed by the workbook pages. Even using just one a day was too much for him at times due to the amount of writing. Additionally, not having something to watch at the same time as listening didn't help him pay attention.

Learn what other TOS Crew members thought by visiting the Crew Blog.


Photobucket


Disclaimer: I received a free download of this product to enable me to write this review.I have not been compensated in any other manner and all opinions expressed here are solely my own.

Friday, December 23, 2011

Read Alouds this Week

We haven't accomplished a lot of academic work this week, but have done some reading.

A couple weeks ago we started The Best Christmas Pageant Ever.I remembered reading this as a child and wanted to share it. I think it was as much fun to read out loud as to myself. While there are a few black and white illustrations in the text, there are just so many mental images that the text evokes that it is just plain fun.


About a month ago, I began reading this Luther biography aloud.  I had intended to read it towards the end of October to coincide with Reformation Day, but we all know about good intentions, don't we? Anyway, we are now about three quarters of the way through it.

We have also read several picture books about the holidays over the last several weeks, but I don't remember the exact titles so I won't mention them.

I am linking this post with Debra at Footprints in the Butter where she hosts a weekly read aloud challenge.

Thursday, December 22, 2011

'Twas the Week Before Christmas wrap up


In my life this week…
I cleaned off a portion of the island separating the kitchen and living room and dug out a puzzle. This puzzle doesn't come out very often as it is a montage of Christmas cookies. Many of the same cookies and most elaborately decorated.  It is challenging, but only in season for a short time, so I decided it was time to work on it. Adding to the challenge is the pieces are of different sizes. One side of the puzzle has fairly large pieces, but as you move right the pieces get smaller. My children have been joining in, especially my 7 year old who enjoys puzzles, but I think I have done most of it. I think he doesn't care for the smaller pieces as much.

I have also been cleaning house this week in anticipation of Christmas. Also trying to stay on top of laundry so I don't have to do it on the weekend, which is my normal laundry time.

In our homeschool this week…
Must we go there? I had all kinds of fun and exciting Christmas themed learning experiences planned for this week.  Have we done them? NO I just haven't been able to capture and keep the young ones attention. We had two semi good days. At least piano practice has been attempted.

Questions/thoughts I have…
Memo to myself: Plan for a Christmas break, so I don't get frustrated when we don't accomplish all the fun things I had hoped.

I’m reading…
I finished Your Child's Writing Life. This was a beneficial book. I will have to check it out from the library again. I liked several of the unique ideas to encourage youngsters to write.

I’m grateful for…
Friends

A photo, video, link, or quote to share…

Our Tree this Year
;Thanks to Sue at The Homeschool Chick for hosting HSMJ!

Sunday, December 11, 2011

Homeschool Mothers Journal Weekly Review 12/11


In our homeschool this week…
We are trying to finish up Ancient Egypt. I am not sure how long we have been working on the topic, but there is just so much information and the children have been interested so we've kept going.  My interest is starting to wan, so I am looking forward to something new in history.

Places we’re going and people we’re seeing…
We had the normal activities this week; piano and a library visit.
In addition, my daughter had the opportunity to play piano at the Headquarters of the Lutheran Church Missouri Synod this week. Her teacher was giving a concert there and he invited her to play Bach's Minuet in G at the beginning. While she has been playing this piece for several months, this was her best performance.

My favorite thing this week was…
Listening to the Christmas Hymns and carols both my children have been playing on the piano. 

Supervising daughter make her first batch of sugar cookies.  The most I helped was putting  the cookies in and out of the oven.

What’s working/not working for us…
So far, we have been able to focus on normal subjects and studies quite well, even though it is December.

Questions/thoughts I have…
When should we put the Christmas tree and decorations up.

I’m reading…
Your Child's Writing Life by Pam Allyn

I’m cooking…
My familys favorite meal this week was Minestone Soup.  We found this mix from a company called Bear Creek. Everyone, including 7 year old son, who is a choosy eater really likes it.

Thanks to Sue at the Homeschool Chick for hosting HSMJ.

Fractazmic TOS Review


"The most fun you'll ever have learning fractions!" 
(from iseecards website)


Fractazmic is a deck of cards designed to teach and reinforce equivalent fractions and addition of fractions to make a whole. It practices tenths, twelfths, and sixteenths. Each of these fraction groups has its own suit of cards and its own color. Each card features a fraction, from the same family, but with different numerators and denominators. The goal of the game is to collect enough cards of the same suit to make a whole of the pictured item. To make that whole, players pick up and discard cards and then must convert some of the fractions so that they all have a common denominator and finally adding them together to see how close they have come to making a whole.


In addition to the fraction the card face also features a picture to illustrate the fraction. One suit has a water bottle with varying amounts of water, another has an egg cartoon with eggs, and the third has grasshoppers being measured.  These pictures also subtlety teach how fractions are used in real life. Players also learn length, liquid measurement, and making a dozen.

Directions for play are included with the cards.

iseecards also has card games available for practicing basic math operations, prime numbers and basic math and language. Click here to learn more. Each variety is reasonably priced at $6.95.

Fractazmic cards are labelled with an age range of grades 1-8, fun for all ages.

Our Experience

Both my 7 year old and 10 year old enjoyed playing Fractazmic.They wanted to play quite frequently and then multiple games at a time. My 7 year old did have difficulty with playing, he has not had experience with adding fractions of different denominators. So that he could be included in play I helped him add up the fractions and we wrote things down as we were playing. After several games he was able to do some computation of the tenths on his own. He said, " This was a hard game, but a lot of fun."

Fractazmic was great practice for my 10 year old. Because she has learned how to add fractions with unlike denominators Fractazmic is great reinforcement for her.I didn't let her use paper and pencil for the addition, but I did let her right down her totals towards a whole for each suit. She also requested to play it quite frequently.

As my 7 year old has not had this fraction experience we needed a mini fraction lesson first and plenty of reminders throughout the game. Because of this the playing time for each game was quite long. Because of this we were not able to take the cards out of the box and start playing Fractazmic, it really did require some preparation.

We found the directions as written challenging to understand and play at first, but we did figure it out in time. While trying to find our way we played several different ways of our own. We came up with an Old Maid/Go Fish game as well as the game in the directions.

I like games with teach or reinforce educational concepts.They are a great tool to help with mastery, yet make it fun and offer a change of pace from drill or worksheets.Not only do players practice fraction addition with fractazmic, it also offers the opportunity to reinforce fraction terminology such as numerator and denominator. Learning fractions is indeed fun with Fractazmic.

Last year as part of the TOS crew I also had the privilege of reviewing the Pyramath cards. We continue to play and enjoy that game as well.

See what other TOS Crew members had to say about Fractazmic at the Crew Blog.

Photobucket


Disclaimer: I received a free deck of Fractazmic cards in order to write this review.I have not been compensated in any other manner and all opinions expressed here are solely my own.

Wednesday, December 7, 2011

Teacher Geek TOS Review

One of the more popular topics in education lately is STEM or Science, Technology, Engineering, and Mathematics, as well as giving students a full, rounded background in these areas. It is certainly possible to teach these subjects using a textbook or lectures, but I believe it is even more exciting to use hands-on methods when possible.Since these subjects play a major role in current and future professions, doesn't it make sense to teach in a manner which will get students interested and excited?


Photobucket


Teacher Geek believes the best way to help students learn valuable STEM concepts is to involve them in the whole process; from understanding and design to construction and innovation and redesign. To accomplish this goal they have taken these crucial concepts and developed ways to teach them through hands-on building projects with kits or individual components. They also have a large variety of concept-focused lab plans to explain and teach. Some of the topics for which Teacher Geek has materials include wind and energy, structures, vehicles, hydraulics and pneumatics,  projectile launchers, and electronic bugs. They also sell a wide variety of individual parts and supplies.

We had the opportunity to review the Advanced Hydraulic Arm from Teacher Geek. I also received a cutting tool and reamer which are necessary for assembling the kit, but are sold separately.This is a kit which retails for $16.18. Teacher Geek is generously providing a discount code for the next two months which will give purchasers 10% off Teacher Geek products. The code is: hschool

Please note that this kit is not designed to be a toy, but a teaching tool. The directions are sufficiently technical and abstract as to be a good exercise of spatial and mathematical improvisation, and the kits are more of a proof-of-concept designed to illustrate the design principles.

Advanced Hydraulic Arm


Our Experience

My husband and 10-year-old daughter assembled the hydraulic arm together. This was a project which kept them busy for two to three hours. The manual's quick start guide was really well done. She was able to complete the first couple of steps with the exception of cutting the dowel and connector strips. However, it quickly became a two person project.

After the first several steps we ran into problems with the directions. Some of the problems we experienced:
  •  Some of the measurements were incorrect at times. For example, one part of the directions stated a 40 mm dowel, when it needed to be about 90mm in order to fit.
  • It was not clear why the measurements were odd-sized, like 51mm, 76mm, and so on. Why not a more even number? With some parts tight against each other in a few places, like the 3ml syringe holder, it sometimes causes one to wonder if the kits could have used an extra millimeter here or there.
  • Changes were made in the size of the screws, but not in all the directions. In some places, this made it necessary to improvise by scaling measurements down to fit (from 19mm to 11mm). An adult might find this doable, but a child in middle school would find it challenging.
  • Some pages were very detailed in showing what holes to ream or not to ream. Other pages did not use the symbols for reaming or not reaming holes in the same consistent manner. Also, calling out the one smaller syringe clip as something to be set aside and definitely not to ream would be clearer.
  • The syringes do not fit snugly against the base of the control panel because there is not enough space between all of the holes on the panel to allow for the width of the top of the syringe.
  • Directions are given for placing parts on the arm after they are shown in the pictures.
  • It wasn't clear that dowel ends were to extend on both sides of the arm either from the directions or picture because the far ends of the dowel did not show up as well against the white background as the near ends. This was not difficult to correct.
  • The total effect of the inconsistencies in the directions led to a bit of head-scratching and frustration because one would be second-guessing oneself and the directions. Even the lengths of the tubing seemed off, because the one 81cm tube has about 10cm slack in it compared to the other tubes. In finishing up, it was actually easier to look at a picture and set aside the directions.
The kit came with extra quantities of some parts. I also found several parts in my shipment which were not mentioned in the kit. We can't find a use for them in the hydraulic arm. In fact, if some parts had been used, the arm would not have worked properly.

After cutting the required pieces for the project the cutting tool was showing slight signs of deforming after cutting the plastic, but it did hold up to complete the project. It might last for some time yet. A redesign from a thin wedge design to a chisel-type design for the cutting blade on the tool might help.

While looking at the packing list I was surprised I actually received it because there were errors in my name, address, and ZIP code.

Despite the challenges encountered in the construction, the hydraulic arm turned out very well.  It is easy to operate and after some practice both my 10 and 7 year old are able to pick up different objects with it.  They have figured out how much to push or pull the control syringes to get it to move in the direction and amount they desire.  They are certainly having fun with it.


I also used the learning lab publication with both of them. We used this after the arm was constructed and they had tried it out a little because after previewing I felt they would get more out of it after seeing the completed arm. While some of the math in it is difficult for them, they seem to be picking up the majority of the concepts it contains and applying them to the arm. My 7 year old also pointed out the hydraulic parts on construction equipment he saw while we were traveling.

While I could not find a recommended age or grade level I would not attempt construction of this project with a student any younger than 10 or 11.

My husband would be open to purchasing similar kits. They remind him of the engineers he went to college with.


Disclaimer: I received a free kit for the purpose of writing this review.  I have not been compensated in any other manner. All views expressed here are solely my own.

Monday, December 5, 2011

Pitsco TOS Review

PhotobucketPitsco Education


http://shop.pitsco.com/store/default.aspx?groupID=135


Medieval Machines Kit   Item # W37789   $21.95
The kit has a grade level of Intermediate/Middle School

Some of the great things about homeschooling are the flexibility to explore concepts not directly related to our current studies and taking time to do hands-on projects. One of the challenges (at least for me) to these benefits is gathering together all the materials for a project. So I am excited to find easy kits to help me provide imaginative hands-on learning experiences.

Pitsco Education specializes in providing various products; kits, hands-on activities and projects in the subject areas of Math, Science, Technology and Engineering.Their products are available for K-12 grades.

PhotobucketCurrently we had the opportunity to review some very nice siege machine kits.  Pitsco recently sent TOS Crew members catapult and trebuchet kits along with a siege machine booklet. Each machine kit contained a piece of bass wood with all the parts die cut, numbered, and ready to punch out, with instructions. The trebuchet also came with the wire (paperclips), thread, and fabric needed to make a working model. Clay was also included in the set. After all, what fun is it to make siege machines and not have anything with which to test them?


Our Experiences

My 10 year old daughter was excited to have the opportunity to make and test this catapult and trebuchet.  She is very interested in science and putting things together.  We started with the catapult kit and I am glad we did. She very easily put together the majority of this machine. The instructions were clear and straightforward enough that she was able to do it herself.  I was available so she could double check if she had a question.


However, when it came time to put the arm and trigger on my husband stepped in to help her out.We found it was necessary to sand the center of the dowel in order to get it to fit on the catapult arm.  The holes on the frame of the catapult where the dowel goes through were slightly too big. The solution for this was to use a lot of wood glue, lots of drying time and gluing the outside donuts on. Attaching the trigger also required assistance from dad, with a little more sanding and filing to get everything working smoothly.

The finished size of the catapult is about 6 inches long and 5 inches high. The catapult is surprisingly heavy and sturdy, which was a pleasant surprise.  It stayed in place and didn't jump around when flinging projectiles across the room. The projectiles really flew. We weren't able to make projectiles the sizes suggested in the lesson plans since I don't have a way to measure grams. Instead we used a kitchen scale to measure an ounce of clay and then guesstimated sizes for fractions of an ounce.


The trebuchet kit was was more difficult to assemble. Daughter was able to put together the frame and make the measurements for the center strip,but she ran into difficulty after that.  The first challenge was making notches in two of the pieces used to support the bottom of the frame.  She had not used a craft knife before and was reluctant to do this step. She also was not able to bend the wires to make the various catches and hooks necessary. A template included with the kit helped to make sure they were bent just right. The steps for making the sling were also fairly difficult for her. So my husband helped her to finish the model.


These were biggest difficulties with the trebuchet.
  • The hook and string application were challenging until the Shoe Goo was brought out. 
  • Epoxy was used to attach the ferrule to the arm. 
  • Making the sling was challenging since some of the photos were fairly dark.

Over all, my  husband said his model building experience was a plus in constructing the trebuchet as he felt  the instructions assumed building knowledge instead of spelling out some helpful tips.  The instructions gave the end result in many places, but left the user trying to figure out how to get to that point. He felt the catapult directions were very user friendly and helpful. He also thought the drying times in both directions were a little short. Some of this may be due to the fact we choose wood glue for most of the work.

The finished size of the trebuchet is approximately 12 inches long and 15 inches high, when the weights are removed.


The trebuchet was also very good at throwing projectiles across the room. Generally things flew farther with the trebuchet than the catapult.

We found that using craft clamps came in handy for putting both kits together. This helped to assure a good bond between the pieces.

Both kits require additional supplies. These are materials like:
  • glue
  • hobby knife
  • needlenose pliers
  • marker/pen
  • sandpaper
  • ruler
  • scissors
  • safety goggles
  • toothpick or glue applicator
 The Siege Machines book includes a complete and very interesting history of both machines.  This was interesting to my 7 year old son as well. Activities in the book apply to the disciplines of math and science for each machine as well. We used several of these, but I did a lot of the mathematical figuring as the children were not familiar enough with the concepts to do so. The book ends with the standards in history science, and math addressed by the activities. The activities in the book, as well as the building instructions, emphasize safety while building and using the completed projects. This includes wearing safety goggles.

From our experience I would say that the catapult kit certainly is doable for a 10 year old child with some help, a child a little older would likely be able to do more on their own.  The trebuchet kit we found to be more difficult, thus I would say it would be better suited for an older student or someone who has experience with building other models.

Many of the kit components were labelled as assembled in the United States.  While I was not able to definitely determine the manufacturing country, I was pleased to see that at least some assembly work was done here in the US.

Other members of the TOS Crew also had the opportunity to use and review the catapult and trebuchet as well.  Read what they had to say at the TOS Crew blog.


Photobucket


Disclaimer: I received the above described items in order to be able to write this review.  I have not been compensated in any other manner. All views expressed here are solely my own.

Thursday, December 1, 2011

Daughters' Art

Virtual Refridgerator

Yesterday I posted my TOS review for Artistic pursuits. The book I reviewed was one of them from the K-3 collection. My daughter is older than that, but she enjoys art, so I really couldn't tell her she couldn't do the projects included.  However, I didn't want to give unrealistic expectations of the results to readers of my review. So I told her I would post pictures of her work inspired by the book in a separate post. Since the Virtual Refrigerator falls the day after I posted my review I thought it was the perfect opportunity to showcase her work.


These are a couple chenille stem sculptures she made from a lesson studying sculpture. Her sculptures area present and dragonfly.


The first lesson taught the artist to pay attention to things in their world and concluded with their painting a scene they knew with gouache paint.  The second lessons project focused on mixing paint colors and making a color wheel. This demonstrated how numerous colors can be made from just three colors.


Another lesson focused on Monet and how he saw things differently depending on the time of day and light. The students were then instructed to paint a series of pictures showing the same object or scene, but at different times or seasons.  Here she showed a tree in different seasons.

Thanks to Jennifer at A Glimpse of Our Life for hosting the Virtual Refrigerator.