Friday, December 30, 2011
Homeschool Spanish TOS Review
Homeschool Spanish is a complete Spanish curriculum for the entire family. The program currently available is geared to elementary ages with a high school supplement coming soon according to the website.
The Homeschool Spanish curriculum includes a textbook, workbook, answer book, and audio files. This bundle is available as a download ($49.95) or hard copy ($89.95) There is also a Daily Curriculum guide available for an additional cost with both of these bundles. The Daily Curriculum guide is not available separately, the bundle prices increase $10.00 if you wish to order it. Ordering is simple on the Homeschool Spanish website.
The audio files both introduce the vocabulary and phrases as well as the answers on many activities. The files are recorded by native Mexican Spanish speakers.
Homeschool Spanish is designed to incorporate foreign language lessons into daily life and lessons, something many homeschoolers have learned to do with multiple subjects.The curriculum uses listening, reading, writing, and speaking to fully teach the language. By emphasizing integration into daily life Homeschool Spanish makes learning Spanish like second nature and increases retention. There are 10 units with each unit containing 2-4 lessons or separate, but related vocabulary lists.
Vocabulary list topics include things like colors, numbers, family members, people, foods, body parts, clothes, transportation, places, months, days and seasons. Many of these are very appealing to and practical for children ( also practical for adults!)
Some of the more common activities suggested included keeping a journal in Spanish, making a board game, using puppets,or chalkboard type games and singing songs.Some of the more innovative ideas include using family pictures to practice people names, finding pictures in magazines to match with food or objects, or writing and illustrating their own comic strips.
There is not a lot of focus on grammar in the program, but each unit concludes with several pages explaining grammer related to that chapter.
Homeschool Spanishs' website provides many cultural website links so that in addition to learning the language students can get a peek into the Mexican Spanish culture.Topics included in the links are history, geography, people, animals, and just plain fun.
You can download samples of several of the curriculum here.
My Thoughts
Homeschool Spanish provides numerous ideas for games, activities, and personal interaction which aid learning and retention while making the process fun and less tedious and dry. By using so many different methods, this program easily works for students with many differing learning styles. There is something for the auditory, visual, and tactile learners.
I love all the teacher support present in Homeschool Spanish. I know a lot of time and effort went into the writing and compiling. Even though I already use a planner, there isn't a whole lot of room to write down specifics of what I want to do. Using Homeschool Spanish's Daily Curriculum guide for just this one subject I found plenty of innovative ideas for making learning fun and increasing retention. There is also a blank curriculum planning grid in the book which allows the user to write out their own plan of activities for a week.There is plenty of room for writing plans covering different concepts and activities related to the Spanish curriculum. I can very easily clip it over my planner page for the week and have a detailed plan for Spanish handy. By having a place to write down not only the text or written work I want accomplished each day as well as the websites to visit or special activities I find it so much easier to do creative things with my children. It was also easy to see if I had chosen a variety of activities.
I also like how simply and cleanly the book pages are laid out. There is a small heading at the top and then two separate columns featuring vocabulary and phrases with their English translation for the lesson. The bottom of the page has reminders to the instructor.
I do not know Spanish, so having the audio is a must for me.The audio answers are also great. Not only can my children check their own work this way, but the proper pronunciation and inflection is reinforced.
I also love all the ideas for the extra, reinforcement activities for each lesson. For the lesson on colors I used a crayon of each of the colors in the lesson and had my children name the color in Spanish or they took turns asking for a crayon in a specific color in Spanish.
One additional idea I came up with during our break was to check the collection of board books at our library for some covering the same concepts as we have had so far in REAL Homeschool Spanish. Board books generally have shorter sentences of present concepts singularly so they would be easier to read for a beginning language student than a longer book.
My 10 year old daughter appreciates that the program is not for little kids. She likes not having cartoon characters or cutesy pages. She enjoyed the written activity and puzzle pages. She liked the variety in these pages. They do not feature the same puzzles and written games each lesson.
My 7 year old used the program and enjoyed the audio portions, games or activities, and the cultural studies but was easily overwhelmed by the workbook pages. Even using just one a day was too much for him at times due to the amount of writing. Additionally, not having something to watch at the same time as listening didn't help him pay attention.
Learn what other TOS Crew members thought by visiting the Crew Blog.
Disclaimer: I received a free download of this product to enable me to write this review.I have not been compensated in any other manner and all opinions expressed here are solely my own.
Friday, December 23, 2011
Read Alouds this Week
We haven't accomplished a lot of academic work this week, but have done some reading.
A couple weeks ago we started The Best Christmas Pageant Ever.I remembered reading this as a child and wanted to share it. I think it was as much fun to read out loud as to myself. While there are a few black and white illustrations in the text, there are just so many mental images that the text evokes that it is just plain fun.
About a month ago, I began reading this Luther biography aloud. I had intended to read it towards the end of October to coincide with Reformation Day, but we all know about good intentions, don't we? Anyway, we are now about three quarters of the way through it.
We have also read several picture books about the holidays over the last several weeks, but I don't remember the exact titles so I won't mention them.
I am linking this post with Debra at Footprints in the Butter where she hosts a weekly read aloud challenge.
Thursday, December 22, 2011
'Twas the Week Before Christmas wrap up
In my life this week…
I cleaned off a portion of the island separating the kitchen and living room and dug out a puzzle. This puzzle doesn't come out very often as it is a montage of Christmas cookies. Many of the same cookies and most elaborately decorated. It is challenging, but only in season for a short time, so I decided it was time to work on it. Adding to the challenge is the pieces are of different sizes. One side of the puzzle has fairly large pieces, but as you move right the pieces get smaller. My children have been joining in, especially my 7 year old who enjoys puzzles, but I think I have done most of it. I think he doesn't care for the smaller pieces as much.
I have also been cleaning house this week in anticipation of Christmas. Also trying to stay on top of laundry so I don't have to do it on the weekend, which is my normal laundry time.
In our homeschool this week…
Must we go there? I had all kinds of fun and exciting Christmas themed learning experiences planned for this week. Have we done them? NO I just haven't been able to capture and keep the young ones attention. We had two semi good days. At least piano practice has been attempted.
Questions/thoughts I have…
Memo to myself: Plan for a Christmas break, so I don't get frustrated when we don't accomplish all the fun things I had hoped.
I’m reading…
I finished Your Child's Writing Life. This was a beneficial book. I will have to check it out from the library again. I liked several of the unique ideas to encourage youngsters to write.
I’m grateful for…
Friends
A photo, video, link, or quote to share…
;Thanks to Sue at The Homeschool Chick for hosting HSMJ!
Our Tree this Year |
Sunday, December 11, 2011
Homeschool Mothers Journal Weekly Review 12/11
In our homeschool this week…
We are trying to finish up Ancient Egypt. I am not sure how long we have been working on the topic, but there is just so much information and the children have been interested so we've kept going. My interest is starting to wan, so I am looking forward to something new in history.
Places we’re going and people we’re seeing…
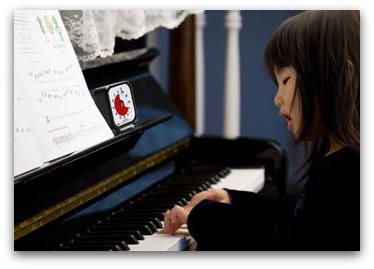
We had the normal activities this week; piano and a library visit.
In addition, my daughter had the opportunity to play piano at the Headquarters of the Lutheran Church Missouri Synod this week. Her teacher was giving a concert there and he invited her to play Bach's Minuet in G at the beginning. While she has been playing this piece for several months, this was her best performance.
My favorite thing this week was…
Listening to the Christmas Hymns and carols both my children have been playing on the piano.
Supervising daughter make her first batch of sugar cookies. The most I helped was putting the cookies in and out of the oven.
What’s working/not working for us…
So far, we have been able to focus on normal subjects and studies quite well, even though it is December.
Questions/thoughts I have…
When should we put the Christmas tree and decorations up.
I’m reading…
Your Child's Writing Life by Pam Allyn
I’m cooking…
My familys favorite meal this week was Minestone Soup. We found this mix from a company called Bear Creek. Everyone, including 7 year old son, who is a choosy eater really likes it.
Thanks to Sue at the Homeschool Chick for hosting HSMJ.
Fractazmic TOS Review
"The most fun you'll ever have learning fractions!"
(from iseecards website)
Fractazmic is a deck of cards designed to teach and reinforce equivalent fractions and addition of fractions to make a whole. It practices tenths, twelfths, and sixteenths. Each of these fraction groups has its own suit of cards and its own color. Each card features a fraction, from the same family, but with different numerators and denominators. The goal of the game is to collect enough cards of the same suit to make a whole of the pictured item. To make that whole, players pick up and discard cards and then must convert some of the fractions so that they all have a common denominator and finally adding them together to see how close they have come to making a whole.
In addition to the fraction the card face also features a picture to illustrate the fraction. One suit has a water bottle with varying amounts of water, another has an egg cartoon with eggs, and the third has grasshoppers being measured. These pictures also subtlety teach how fractions are used in real life. Players also learn length, liquid measurement, and making a dozen.
Directions for play are included with the cards.
iseecards also has card games available for practicing basic math operations, prime numbers and basic math and language. Click here to learn more. Each variety is reasonably priced at $6.95.
Fractazmic cards are labelled with an age range of grades 1-8, fun for all ages.
Our Experience
Both my 7 year old and 10 year old enjoyed playing Fractazmic.They wanted to play quite frequently and then multiple games at a time. My 7 year old did have difficulty with playing, he has not had experience with adding fractions of different denominators. So that he could be included in play I helped him add up the fractions and we wrote things down as we were playing. After several games he was able to do some computation of the tenths on his own. He said, " This was a hard game, but a lot of fun."
Fractazmic was great practice for my 10 year old. Because she has learned how to add fractions with unlike denominators Fractazmic is great reinforcement for her.I didn't let her use paper and pencil for the addition, but I did let her right down her totals towards a whole for each suit. She also requested to play it quite frequently.
As my 7 year old has not had this fraction experience we needed a mini fraction lesson first and plenty of reminders throughout the game. Because of this the playing time for each game was quite long. Because of this we were not able to take the cards out of the box and start playing Fractazmic, it really did require some preparation.
We found the directions as written challenging to understand and play at first, but we did figure it out in time. While trying to find our way we played several different ways of our own. We came up with an Old Maid/Go Fish game as well as the game in the directions.
I like games with teach or reinforce educational concepts.They are a great tool to help with mastery, yet make it fun and offer a change of pace from drill or worksheets.Not only do players practice fraction addition with fractazmic, it also offers the opportunity to reinforce fraction terminology such as numerator and denominator. Learning fractions is indeed fun with Fractazmic.
Last year as part of the TOS crew I also had the privilege of reviewing the Pyramath cards. We continue to play and enjoy that game as well.
See what other TOS Crew members had to say about Fractazmic at the Crew Blog.
Disclaimer: I received a free deck of Fractazmic cards in order to write this review.I have not been compensated in any other manner and all opinions expressed here are solely my own.
Wednesday, December 7, 2011
Teacher Geek TOS Review
One of the more popular topics in education lately is STEM or Science, Technology, Engineering, and Mathematics, as well as giving students a full, rounded background in these areas. It is certainly possible to teach these subjects using a textbook or lectures, but I believe it is even more exciting to use hands-on methods when possible.Since these subjects play a major role in current and future professions, doesn't it make sense to teach in a manner which will get students interested and excited?
Teacher Geek believes the best way to help students learn valuable STEM concepts is to involve them in the whole process; from understanding and design to construction and innovation and redesign. To accomplish this goal they have taken these crucial concepts and developed ways to teach them through hands-on building projects with kits or individual components. They also have a large variety of concept-focused lab plans to explain and teach. Some of the topics for which Teacher Geek has materials include wind and energy, structures, vehicles, hydraulics and pneumatics, projectile launchers, and electronic bugs. They also sell a wide variety of individual parts and supplies.
We had the opportunity to review the Advanced Hydraulic Arm from Teacher Geek. I also received a cutting tool and reamer which are necessary for assembling the kit, but are sold separately.This is a kit which retails for $16.18. Teacher Geek is generously providing a discount code for the next two months which will give purchasers 10% off Teacher Geek products. The code is: hschool
Please note that this kit is not designed to be a toy, but a teaching tool. The directions are sufficiently technical and abstract as to be a good exercise of spatial and mathematical improvisation, and the kits are more of a proof-of-concept designed to illustrate the design principles.
Our Experience
My husband and 10-year-old daughter assembled the hydraulic arm together. This was a project which kept them busy for two to three hours. The manual's quick start guide was really well done. She was able to complete the first couple of steps with the exception of cutting the dowel and connector strips. However, it quickly became a two person project.
After the first several steps we ran into problems with the directions. Some of the problems we experienced:
After cutting the required pieces for the project the cutting tool was showing slight signs of deforming after cutting the plastic, but it did hold up to complete the project. It might last for some time yet. A redesign from a thin wedge design to a chisel-type design for the cutting blade on the tool might help.
While looking at the packing list I was surprised I actually received it because there were errors in my name, address, and ZIP code.
Despite the challenges encountered in the construction, the hydraulic arm turned out very well. It is easy to operate and after some practice both my 10 and 7 year old are able to pick up different objects with it. They have figured out how much to push or pull the control syringes to get it to move in the direction and amount they desire. They are certainly having fun with it.
I also used the learning lab publication with both of them. We used this after the arm was constructed and they had tried it out a little because after previewing I felt they would get more out of it after seeing the completed arm. While some of the math in it is difficult for them, they seem to be picking up the majority of the concepts it contains and applying them to the arm. My 7 year old also pointed out the hydraulic parts on construction equipment he saw while we were traveling.
While I could not find a recommended age or grade level I would not attempt construction of this project with a student any younger than 10 or 11.
My husband would be open to purchasing similar kits. They remind him of the engineers he went to college with.
Disclaimer: I received a free kit for the purpose of writing this review. I have not been compensated in any other manner. All views expressed here are solely my own.
Teacher Geek believes the best way to help students learn valuable STEM concepts is to involve them in the whole process; from understanding and design to construction and innovation and redesign. To accomplish this goal they have taken these crucial concepts and developed ways to teach them through hands-on building projects with kits or individual components. They also have a large variety of concept-focused lab plans to explain and teach. Some of the topics for which Teacher Geek has materials include wind and energy, structures, vehicles, hydraulics and pneumatics, projectile launchers, and electronic bugs. They also sell a wide variety of individual parts and supplies.
We had the opportunity to review the Advanced Hydraulic Arm from Teacher Geek. I also received a cutting tool and reamer which are necessary for assembling the kit, but are sold separately.This is a kit which retails for $16.18. Teacher Geek is generously providing a discount code for the next two months which will give purchasers 10% off Teacher Geek products. The code is: hschool
Please note that this kit is not designed to be a toy, but a teaching tool. The directions are sufficiently technical and abstract as to be a good exercise of spatial and mathematical improvisation, and the kits are more of a proof-of-concept designed to illustrate the design principles.
Advanced Hydraulic Arm |
Our Experience
My husband and 10-year-old daughter assembled the hydraulic arm together. This was a project which kept them busy for two to three hours. The manual's quick start guide was really well done. She was able to complete the first couple of steps with the exception of cutting the dowel and connector strips. However, it quickly became a two person project.
After the first several steps we ran into problems with the directions. Some of the problems we experienced:
- Some of the measurements were incorrect at times. For example, one part of the directions stated a 40 mm dowel, when it needed to be about 90mm in order to fit.
- It was not clear why the measurements were odd-sized, like 51mm, 76mm, and so on. Why not a more even number? With some parts tight against each other in a few places, like the 3ml syringe holder, it sometimes causes one to wonder if the kits could have used an extra millimeter here or there.
- Changes were made in the size of the screws, but not in all the directions. In some places, this made it necessary to improvise by scaling measurements down to fit (from 19mm to 11mm). An adult might find this doable, but a child in middle school would find it challenging.
- Some pages were very detailed in showing what holes to ream or not to ream. Other pages did not use the symbols for reaming or not reaming holes in the same consistent manner. Also, calling out the one smaller syringe clip as something to be set aside and definitely not to ream would be clearer.
- The syringes do not fit snugly against the base of the control panel because there is not enough space between all of the holes on the panel to allow for the width of the top of the syringe.
- Directions are given for placing parts on the arm after they are shown in the pictures.
- It wasn't clear that dowel ends were to extend on both sides of the arm either from the directions or picture because the far ends of the dowel did not show up as well against the white background as the near ends. This was not difficult to correct.
- The total effect of the inconsistencies in the directions led to a bit of head-scratching and frustration because one would be second-guessing oneself and the directions. Even the lengths of the tubing seemed off, because the one 81cm tube has about 10cm slack in it compared to the other tubes. In finishing up, it was actually easier to look at a picture and set aside the directions.
After cutting the required pieces for the project the cutting tool was showing slight signs of deforming after cutting the plastic, but it did hold up to complete the project. It might last for some time yet. A redesign from a thin wedge design to a chisel-type design for the cutting blade on the tool might help.
While looking at the packing list I was surprised I actually received it because there were errors in my name, address, and ZIP code.
Despite the challenges encountered in the construction, the hydraulic arm turned out very well. It is easy to operate and after some practice both my 10 and 7 year old are able to pick up different objects with it. They have figured out how much to push or pull the control syringes to get it to move in the direction and amount they desire. They are certainly having fun with it.
I also used the learning lab publication with both of them. We used this after the arm was constructed and they had tried it out a little because after previewing I felt they would get more out of it after seeing the completed arm. While some of the math in it is difficult for them, they seem to be picking up the majority of the concepts it contains and applying them to the arm. My 7 year old also pointed out the hydraulic parts on construction equipment he saw while we were traveling.
While I could not find a recommended age or grade level I would not attempt construction of this project with a student any younger than 10 or 11.
My husband would be open to purchasing similar kits. They remind him of the engineers he went to college with.
Disclaimer: I received a free kit for the purpose of writing this review. I have not been compensated in any other manner. All views expressed here are solely my own.
Monday, December 5, 2011
Pitsco TOS Review
Pitsco Education
http://shop.pitsco.com/store/default.aspx?groupID=135
Medieval Machines Kit Item # W37789 $21.95
The kit has a grade level of Intermediate/Middle School
Some of the great things about homeschooling are the flexibility to explore concepts not directly related to our current studies and taking time to do hands-on projects. One of the challenges (at least for me) to these benefits is gathering together all the materials for a project. So I am excited to find easy kits to help me provide imaginative hands-on learning experiences.
Pitsco Education specializes in providing various products; kits, hands-on activities and projects in the subject areas of Math, Science, Technology and Engineering.Their products are available for K-12 grades.
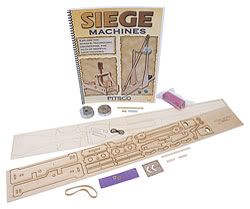
Currently we had the opportunity to review some very nice siege machine kits. Pitsco recently sent TOS Crew members catapult and trebuchet kits along with a siege machine booklet. Each machine kit contained a piece of bass wood with all the parts die cut, numbered, and ready to punch out, with instructions. The trebuchet also came with the wire (paperclips), thread, and fabric needed to make a working model. Clay was also included in the set. After all, what fun is it to make siege machines and not have anything with which to test them?
Our Experiences
My 10 year old daughter was excited to have the opportunity to make and test this catapult and trebuchet. She is very interested in science and putting things together. We started with the catapult kit and I am glad we did. She very easily put together the majority of this machine. The instructions were clear and straightforward enough that she was able to do it herself. I was available so she could double check if she had a question.
However, when it came time to put the arm and trigger on my husband stepped in to help her out.We found it was necessary to sand the center of the dowel in order to get it to fit on the catapult arm. The holes on the frame of the catapult where the dowel goes through were slightly too big. The solution for this was to use a lot of wood glue, lots of drying time and gluing the outside donuts on. Attaching the trigger also required assistance from dad, with a little more sanding and filing to get everything working smoothly.
The finished size of the catapult is about 6 inches long and 5 inches high. The catapult is surprisingly heavy and sturdy, which was a pleasant surprise. It stayed in place and didn't jump around when flinging projectiles across the room. The projectiles really flew. We weren't able to make projectiles the sizes suggested in the lesson plans since I don't have a way to measure grams. Instead we used a kitchen scale to measure an ounce of clay and then guesstimated sizes for fractions of an ounce.
The trebuchet kit was was more difficult to assemble. Daughter was able to put together the frame and make the measurements for the center strip,but she ran into difficulty after that. The first challenge was making notches in two of the pieces used to support the bottom of the frame. She had not used a craft knife before and was reluctant to do this step. She also was not able to bend the wires to make the various catches and hooks necessary. A template included with the kit helped to make sure they were bent just right. The steps for making the sling were also fairly difficult for her. So my husband helped her to finish the model.
These were biggest difficulties with the trebuchet.
Over all, my husband said his model building experience was a plus in constructing the trebuchet as he felt the instructions assumed building knowledge instead of spelling out some helpful tips. The instructions gave the end result in many places, but left the user trying to figure out how to get to that point. He felt the catapult directions were very user friendly and helpful. He also thought the drying times in both directions were a little short. Some of this may be due to the fact we choose wood glue for most of the work.
The finished size of the trebuchet is approximately 12 inches long and 15 inches high, when the weights are removed.
The trebuchet was also very good at throwing projectiles across the room. Generally things flew farther with the trebuchet than the catapult.
We found that using craft clamps came in handy for putting both kits together. This helped to assure a good bond between the pieces.
Both kits require additional supplies. These are materials like:
From our experience I would say that the catapult kit certainly is doable for a 10 year old child with some help, a child a little older would likely be able to do more on their own. The trebuchet kit we found to be more difficult, thus I would say it would be better suited for an older student or someone who has experience with building other models.
Many of the kit components were labelled as assembled in the United States. While I was not able to definitely determine the manufacturing country, I was pleased to see that at least some assembly work was done here in the US.
Other members of the TOS Crew also had the opportunity to use and review the catapult and trebuchet as well. Read what they had to say at the TOS Crew blog.
Disclaimer: I received the above described items in order to be able to write this review. I have not been compensated in any other manner. All views expressed here are solely my own.
http://shop.pitsco.com/store/default.aspx?groupID=135
Medieval Machines Kit Item # W37789 $21.95
The kit has a grade level of Intermediate/Middle School
Some of the great things about homeschooling are the flexibility to explore concepts not directly related to our current studies and taking time to do hands-on projects. One of the challenges (at least for me) to these benefits is gathering together all the materials for a project. So I am excited to find easy kits to help me provide imaginative hands-on learning experiences.
Pitsco Education specializes in providing various products; kits, hands-on activities and projects in the subject areas of Math, Science, Technology and Engineering.Their products are available for K-12 grades.
Currently we had the opportunity to review some very nice siege machine kits. Pitsco recently sent TOS Crew members catapult and trebuchet kits along with a siege machine booklet. Each machine kit contained a piece of bass wood with all the parts die cut, numbered, and ready to punch out, with instructions. The trebuchet also came with the wire (paperclips), thread, and fabric needed to make a working model. Clay was also included in the set. After all, what fun is it to make siege machines and not have anything with which to test them?
Our Experiences
My 10 year old daughter was excited to have the opportunity to make and test this catapult and trebuchet. She is very interested in science and putting things together. We started with the catapult kit and I am glad we did. She very easily put together the majority of this machine. The instructions were clear and straightforward enough that she was able to do it herself. I was available so she could double check if she had a question.
However, when it came time to put the arm and trigger on my husband stepped in to help her out.We found it was necessary to sand the center of the dowel in order to get it to fit on the catapult arm. The holes on the frame of the catapult where the dowel goes through were slightly too big. The solution for this was to use a lot of wood glue, lots of drying time and gluing the outside donuts on. Attaching the trigger also required assistance from dad, with a little more sanding and filing to get everything working smoothly.
The finished size of the catapult is about 6 inches long and 5 inches high. The catapult is surprisingly heavy and sturdy, which was a pleasant surprise. It stayed in place and didn't jump around when flinging projectiles across the room. The projectiles really flew. We weren't able to make projectiles the sizes suggested in the lesson plans since I don't have a way to measure grams. Instead we used a kitchen scale to measure an ounce of clay and then guesstimated sizes for fractions of an ounce.
The trebuchet kit was was more difficult to assemble. Daughter was able to put together the frame and make the measurements for the center strip,but she ran into difficulty after that. The first challenge was making notches in two of the pieces used to support the bottom of the frame. She had not used a craft knife before and was reluctant to do this step. She also was not able to bend the wires to make the various catches and hooks necessary. A template included with the kit helped to make sure they were bent just right. The steps for making the sling were also fairly difficult for her. So my husband helped her to finish the model.
These were biggest difficulties with the trebuchet.
- The hook and string application were challenging until the Shoe Goo was brought out.
- Epoxy was used to attach the ferrule to the arm.
- Making the sling was challenging since some of the photos were fairly dark.
Over all, my husband said his model building experience was a plus in constructing the trebuchet as he felt the instructions assumed building knowledge instead of spelling out some helpful tips. The instructions gave the end result in many places, but left the user trying to figure out how to get to that point. He felt the catapult directions were very user friendly and helpful. He also thought the drying times in both directions were a little short. Some of this may be due to the fact we choose wood glue for most of the work.
The finished size of the trebuchet is approximately 12 inches long and 15 inches high, when the weights are removed.
The trebuchet was also very good at throwing projectiles across the room. Generally things flew farther with the trebuchet than the catapult.
We found that using craft clamps came in handy for putting both kits together. This helped to assure a good bond between the pieces.
Both kits require additional supplies. These are materials like:
- glue
- hobby knife
- needlenose pliers
- marker/pen
- sandpaper
- ruler
- scissors
- safety goggles
- toothpick or glue applicator
From our experience I would say that the catapult kit certainly is doable for a 10 year old child with some help, a child a little older would likely be able to do more on their own. The trebuchet kit we found to be more difficult, thus I would say it would be better suited for an older student or someone who has experience with building other models.
Many of the kit components were labelled as assembled in the United States. While I was not able to definitely determine the manufacturing country, I was pleased to see that at least some assembly work was done here in the US.
Other members of the TOS Crew also had the opportunity to use and review the catapult and trebuchet as well. Read what they had to say at the TOS Crew blog.
Disclaimer: I received the above described items in order to be able to write this review. I have not been compensated in any other manner. All views expressed here are solely my own.
Thursday, December 1, 2011
Daughters' Art
Yesterday I posted my TOS review for Artistic pursuits. The book I reviewed was one of them from the K-3 collection. My daughter is older than that, but she enjoys art, so I really couldn't tell her she couldn't do the projects included. However, I didn't want to give unrealistic expectations of the results to readers of my review. So I told her I would post pictures of her work inspired by the book in a separate post. Since the Virtual Refrigerator falls the day after I posted my review I thought it was the perfect opportunity to showcase her work.
These are a couple chenille stem sculptures she made from a lesson studying sculpture. Her sculptures area present and dragonfly.
The first lesson taught the artist to pay attention to things in their world and concluded with their painting a scene they knew with gouache paint. The second lessons project focused on mixing paint colors and making a color wheel. This demonstrated how numerous colors can be made from just three colors.
Another lesson focused on Monet and how he saw things differently depending on the time of day and light. The students were then instructed to paint a series of pictures showing the same object or scene, but at different times or seasons. Here she showed a tree in different seasons.
Wednesday, November 30, 2011
Artistic Pursuits TOS Review
Artistic Pursuits
http://artisticpursuits.com/
Art Curriculum and Instruction Books for Preschool through High School
$42.95 per book
Art supplies for each book are also available in kit
Prices vary per kit
One of the subjects or activities which is often pushed to the side in our homeschool endeavors is art.My children enjoy it, but it just seems that it is the easiest subject to move off the schedule when we face a time crunch.Thus my children were thrilled when we had the opportunity to review a volume of Artistic Pursuits art curriculum.
We had the opportunity to use and review the Grade K-3 Book 3 Modern Painting and Sculpture.This volume focuses on Impressionist Artists, several other modern art movements and three dimensional art techniques. There are 32 two to three page lessons. Among the impressionists artists you'll find studies of Monet, Pissarro,Cassatt, Gauguin, Seurat, and Van Gogh.Modern art topics include cubism, Expressionism, and Abstract art as well as artists such as Calder and Mondrian. There are several lessons about current forms of artistic expression such as land art, sculpture and computer art.
Lessons in Artistic Pursuits contain one or two pages presenting an artist and talking about their style of art.One or more of the works is featured in full color and discussed.The artists are discussed in their historical and cultural contexts. Following this discussion there are several questions directed to the student which are designed to help them think about the picture they are seeing. The next page is a project for the student to do.All of these are hands on creative works.There are painting projects, sculpture projects, paper crafts, as well as other media such as soap.The painting projects teach various styles and techniques. Sculpture projects use materials such as pipe cleaners, foil, or clay.Several projects combine multiple materials.
While the majority of the book is written to the student, the parent or teacher will also find useful articles about teaching art and history and contemporary art.
Rounding out the book is an extensive bibliography and book/multimedia resource list.You will also find book suggestions throughout the main text.
I am totally impressed with this Art curriculum. I love having all the information in one reference book.I could share information about the artist and then just flip the page and be ready for my children to create a piece of art.This way they can have art appreciation and a hands on experience with one coordinated resource. Also nice about Artistic Pursuits is the spiral binding and clear plastic cover.This allows the book to open and lay flat as well as protect the paper cover.
In addition to the books being written directly to the student in a conversational tone, another big plus for me was the ease of teacher preparation. All I needed to do was read through the 2-3 pages and gather the art supplies. I was able to read the text in no more than 10 minutes and gather all needed supplies in just a few minutes more than it took me to read. The gathering time would have been shortened if I could keep all our art supplies in one place.
Speaking of supplies, there is a fairly hefty list needed to complete all the projects in the book. While most of them are not expensive by themselves, if purchasing them all at the same time they could add up. However, you probably have some of them at home already.While you could just read the text of the book, the child would be missing out on a lot of the fun without the opportunity to make their own masterpieces.
Artistic Pursuits also encourages students to think about art in new ways, not just something hanging on a wall or sitting on a pedestal in a cold museum.Throughout the lessons the student is challenged to see things they encounter daily as art as well as the reality that not everyone likes every piece of art they encounter. While the child is taught to appreciate art and view it from different perspectives, they are also reminded in several lessons that art in a museum is not something they are allowed to touch.
The projects in the book are well thought out and very appropriate for the artist or concept taught.The majority of them could be used as gifts from the young artist to loved ones. As with any art endeavor the quality of the finished project depends on the skill of the artist as well as time and thought put into the project, but the ideas are high quality.
I also appreciate the mix of 2D and 3D artists and projects in the book. This helps teach or reinforce the idea that art is not just flat or drawing and painting.
My 7 year old son is thrilled with the book. He said his favorite part was all the ideas for things to make. While he is within the age range for this book he found the questions asking about things in the paintings to be easy and boring. He is looking forward to learning about more artists and trying his hand at more projects. The pictures featured here are some of his work from the books lessons.
My 10 year old daughter also used the book. While the text was way below her level I think she enjoyed hearing the art history and making the projects as well.I will feature her projects in a separate post as her age and abilities are beyond what would be expected of a student in the target age range.I had her do additional reading about the artists to round out the curriculum for her level.
One problem I experienced was not being able to find many of the resources sited at my library, even though they are a large suburban system.
After using this level of Artistic Pursuits I would not hesitate to purchase additional volumes of Artistic Pursuits if finances were not an issue.
Other TOS Crew members had the opportunity to review other volumes and levels of the Artistic Pursuits program.You can see what they had to say at the Crew Blog.
Disclaimer: I received a free copy of this book to enable me to write this review. I have not been compensated in any other manner and all opinions expressed here are totally my own.
http://artisticpursuits.com/
Art Curriculum and Instruction Books for Preschool through High School
$42.95 per book
Art supplies for each book are also available in kit
Prices vary per kit
One of the subjects or activities which is often pushed to the side in our homeschool endeavors is art.My children enjoy it, but it just seems that it is the easiest subject to move off the schedule when we face a time crunch.Thus my children were thrilled when we had the opportunity to review a volume of Artistic Pursuits art curriculum.
We had the opportunity to use and review the Grade K-3 Book 3 Modern Painting and Sculpture.This volume focuses on Impressionist Artists, several other modern art movements and three dimensional art techniques. There are 32 two to three page lessons. Among the impressionists artists you'll find studies of Monet, Pissarro,Cassatt, Gauguin, Seurat, and Van Gogh.Modern art topics include cubism, Expressionism, and Abstract art as well as artists such as Calder and Mondrian. There are several lessons about current forms of artistic expression such as land art, sculpture and computer art.
Lessons in Artistic Pursuits contain one or two pages presenting an artist and talking about their style of art.One or more of the works is featured in full color and discussed.The artists are discussed in their historical and cultural contexts. Following this discussion there are several questions directed to the student which are designed to help them think about the picture they are seeing. The next page is a project for the student to do.All of these are hands on creative works.There are painting projects, sculpture projects, paper crafts, as well as other media such as soap.The painting projects teach various styles and techniques. Sculpture projects use materials such as pipe cleaners, foil, or clay.Several projects combine multiple materials.
While the majority of the book is written to the student, the parent or teacher will also find useful articles about teaching art and history and contemporary art.
Rounding out the book is an extensive bibliography and book/multimedia resource list.You will also find book suggestions throughout the main text.
Our experience with Artistic Pursuits
I am totally impressed with this Art curriculum. I love having all the information in one reference book.I could share information about the artist and then just flip the page and be ready for my children to create a piece of art.This way they can have art appreciation and a hands on experience with one coordinated resource. Also nice about Artistic Pursuits is the spiral binding and clear plastic cover.This allows the book to open and lay flat as well as protect the paper cover.
In addition to the books being written directly to the student in a conversational tone, another big plus for me was the ease of teacher preparation. All I needed to do was read through the 2-3 pages and gather the art supplies. I was able to read the text in no more than 10 minutes and gather all needed supplies in just a few minutes more than it took me to read. The gathering time would have been shortened if I could keep all our art supplies in one place.
Speaking of supplies, there is a fairly hefty list needed to complete all the projects in the book. While most of them are not expensive by themselves, if purchasing them all at the same time they could add up. However, you probably have some of them at home already.While you could just read the text of the book, the child would be missing out on a lot of the fun without the opportunity to make their own masterpieces.
Artistic Pursuits also encourages students to think about art in new ways, not just something hanging on a wall or sitting on a pedestal in a cold museum.Throughout the lessons the student is challenged to see things they encounter daily as art as well as the reality that not everyone likes every piece of art they encounter. While the child is taught to appreciate art and view it from different perspectives, they are also reminded in several lessons that art in a museum is not something they are allowed to touch.
The projects in the book are well thought out and very appropriate for the artist or concept taught.The majority of them could be used as gifts from the young artist to loved ones. As with any art endeavor the quality of the finished project depends on the skill of the artist as well as time and thought put into the project, but the ideas are high quality.
I also appreciate the mix of 2D and 3D artists and projects in the book. This helps teach or reinforce the idea that art is not just flat or drawing and painting.
My 7 year old son is thrilled with the book. He said his favorite part was all the ideas for things to make. While he is within the age range for this book he found the questions asking about things in the paintings to be easy and boring. He is looking forward to learning about more artists and trying his hand at more projects. The pictures featured here are some of his work from the books lessons.
My 10 year old daughter also used the book. While the text was way below her level I think she enjoyed hearing the art history and making the projects as well.I will feature her projects in a separate post as her age and abilities are beyond what would be expected of a student in the target age range.I had her do additional reading about the artists to round out the curriculum for her level.
One problem I experienced was not being able to find many of the resources sited at my library, even though they are a large suburban system.
After using this level of Artistic Pursuits I would not hesitate to purchase additional volumes of Artistic Pursuits if finances were not an issue.
Other TOS Crew members had the opportunity to review other volumes and levels of the Artistic Pursuits program.You can see what they had to say at the Crew Blog.
Disclaimer: I received a free copy of this book to enable me to write this review. I have not been compensated in any other manner and all opinions expressed here are totally my own.
Sunday, November 20, 2011
Lapbook Sale at In The Hands of a Child
My family has come to really enjoy making lapbooks in the course of their studies. I have designed a couple of them myself, but over time we have also used predesigned kits. Some of these sets we've used are from In The Hands of a Child. Now they have a great deal coming up later this week. As many businesses offer deals to their customers on Black Friday, In the Hands of a Child is doing the same thing.
Then on Saturday, which has been named Smalled Business Saturday you can receive a fabulous discount on their Super Memberships.
On Friday you can shop HOAC's Black Friday sale and receive discounts of up to 45% off HOAC products.
Then on Saturday, which has been named Smalled Business Saturday you can receive a fabulous discount on their Super Memberships.
But that is not all, on Monday, Cyber Monday, they are also giving a discount on all in stock non-HOAC merchandise which they carry.
I love the Project Packs from In the Hands of a Child. I really can't tell you how many of them my children have completed or want to do. They have project packs available on many, many topics that it would be hard not to find something which a child (or Mom) is interested in.
A lapbook project would even be a great break activity for non homeschooled children. HOAC has many holiday and seasonally themed project packs to would fit the bill. Many of them are so fun its hard to believe you are learning at the same time. Also there are not many supplies needed either. Just a printer, paper, scissors, glue, pencils or pens, and a couple file folders or similar weight paper. If you want to get fancy you can use colored paper or crayons as well.
If this sounds remotely intriguing, head over to In the Hands of a Child and check out all the awesome topics and products they have available.
Wednesday, November 16, 2011
Time Timer TOS Review
Time Timer LLC
timetimer.com
support@timetimer.com
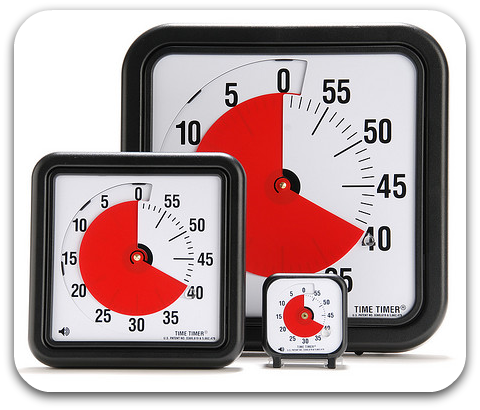
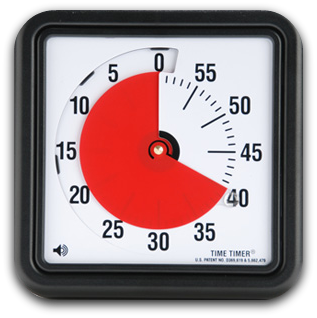
- Time Timer is a portable timer with a opaque cover which can also be flipped back and used as a stand.
- To set, all you do is move the plastic dome from its position at 0 to the time desired and its ready to countdown time. The time which you have it set for will be covered in red. The red disappears as the time countdowns.
- Time Timer has the option of a sound at the end of the set time.
- Time Timer uses the high contrast contrast colors of black, white, and red.
Time Timer comes in several sizes Pricing 3 inch Timer $30.00 8 inch Timer $35.00 12 inch Timer $40.00 Time Timer is also available as an app for iPhone, iPad, and iPod Touch Time Timer is also available as a Wrist Timer, computer software, and a puzzle |
My thoughts
- It is 3 inches square but takes so little room on my desk. It is lightweight and easy to move from room to room or desk to table.
- It is also very easy to use. Setting the timer can be done with one hand.
- The face of Time Timer is very easy to read. Because of the high contrast I can easily see how much time is left from across the room. My children could also see at a glance how much time they had left when taking time tests.
- I like being able to set the tone to tell me when the time was up, but it only goes off once and is not very loud. If I wasn't listening closely for the sound it was easy to miss. On the other hand it was nice to be able to set a timer and not have to run and shut it off when the time was up.
- It was very nice the children could see how much time they had left for math drills. It also gave them perspective as to how long 5 or 10 minutes is. It helped to make the abstract concrete.
I did not think about using Time Timer while my children practiced piano, but that would be an excellent use. I could set the timer for them and then have them be responsible for using all the time they see for practicing their assigned pieces.
Learn what other TOS Crew members had to saw about Time Timer at the Crew Blog.
Disclaimer: I received a free Time Timer to use and write this review. I have not been compensated in any other way and all opinions expressed here are solely my own.
Friday, November 11, 2011
Homeschool Mothers Journal Weekly Review 11/11
The Homeschool Mother's Journal
In my life this week…
Not just this week, but the last few, I just haven't felt like blogging. I have done several reviews which were due, but just didn't feel like doing any other posting. Not like I have kept any regular schedule anyway..
It seems like I have hit a winter slump and its not winter yet. Need to do something to break the routine and add some excitement to life.
In our homeschool this week…
We have just kept plugging along. We've paid a little more attention to art as we are reviewing an art program right now. Both of the kiddos have enjoyed this.
Places we’re going and people we’re seeing…
Nothing different. Piano and the library.
Questions/thoughts I have…
I am thinking about focusing on just a couple things next week. I want to make some Ancient Egypt projects and go some geography study. (According to what I have seen it is geography week). I suppose I could drop most of the other things except for math and spelling.
Still trying to figure out exactly what I am going to do.
The only thing semi interesting was a pot of chilli the other night.
I’m grateful for…
My husband and children.
Thanks to Sue at the Homeschool Chick for hosting HSMJ.
Math Mammoth TOS Review
As part of the TOS Crew I recently had the opportunity to use and review Math Mammoth Grade 3 Complete Mathematics Curriculum(Light Blue Series).
A complete years worth of material comes in two books or downloads. ($34.00)These are labelled Grade level and A or B. There are also answer keys, tests, and reviews available. These are available in download format as either a complete year or just part of a grade. Part A or B for any grade level is available as a download($17.50). The curriculum is also available as printed books from several sources. This page at the Math Mammoth website explains the purchasing options for the 3rd grade level. These sets of 2 books per grade level are available for grades 1-6.
Math Mammoth is built on the principle of having a student master the topic before moving on. Thus few topics are presented over the course of a year, but done in a way which incorporates multiple visual models and encourages understanding of the concept behind the operation and focuses on mental math.
In addition to the complete curriculum, several combinations of supplemental math materials are also available form Math Mammoth. These materials are available either by grade or topic, suitable for grades 1-12.
Placements tests are available on the Math Mammoth website. There is also a question and answer following the placement tests which is very helpful. The supplemental materials could be useful in helping a child master one or two concepts in a level before moving on to the next grade level. Maria also invites parents/teachers to email her with test results if they are having difficulty determining which would be the appropriate level for their child. When I needed assistance in determining which level would be best for my child I received a very prompt reply from Maria. I was very pleased with the response and reasoning for the particular placement. Maria is the author of the Math Mammoth curriculum and a homeschooling Mom.
Maria also offers multiple free samples of her products and a math teaching newsletter on her website. She also maintains a YouTube channel with teaching videos covering a variety of topics.
My Thoughts about Math Mammoth
The Math Mammoth website has a very detailed description of what is covered at each grade level in the complete curriculum. After reading through the description for several grade levels I easily determined at which level I needed to place my son. He had just about completed the second grade level of another series, but it is often hard to know if it is appropriate to move up to the next level when switching to a new program. After using the program I can confidently say that he is in the right place; he is challenged, yet not frustrated.
I used the Third Grade Complete Curriculum Math program mainly with my 7 year old son, but also some of the material with my 10 year old who has struggled with learning multiplication facts.
He said he would like color pictures on the pages, but has also commented that he likes to be able to pronounce the names of people and items which are used in story problems. These comments are in response to another program which we had been using which is not originally American.
My daughter has really liked the Math Mammoth multiplication exercises. I have given her one page of multiplication exercises per day in addition to her normal Math program. She has said that she is learning the facts because it teaches her in different ways. In some of the lessons I have not made her fill in the times chart, but I really think that doing so has been a huge factor in helping her get the facts into her head. As she has worked through these pages and we have drilled the facts from the sheets, I have seen her speed increasing. This tells me she really is learning them.
I really like this math program.The concepts are presented in a clear manner with lots of opportunities for practice, yet not too many which bog down the student who understands what is being taught. There is variety in the way the problems are presented, which not only prevents boredom, but helps the brain work in different ways. This variety also makes sure the student truly understands or masters the material.
I also like the flexibility inherent in the plan. While the 'teacher support materials' give suggestions as to how much should be completed in a day to complete a course in an entire year, the pages themselves are flexible enough to allow for taking a break as needed by the student.
Maria is also very generous in her copying policies.She allows the teacher/purchaser to make enough copies for their entire family. This would be especially great for larger families as they begin their homeschool math journey as they would only need to purchase one math curriculum for all the children in the family rather than a new book for each child.
Crew members had the opportunity to review different products from the Math Mammoth line, so make sure to see what other members of the TOS Crew had to say about the products they used at the Crew Blog.
Disclaimer: I received a free download of this product to use in order to allow me to write this review.I have not been compensated in any other manner and all opinions expressed her are totally my own.
Monday, November 7, 2011
Keyboard Town Pals TOS Review
Keyboard Town Pals
1-866-200-8881
$35.00 CD-ROM program
$30.00 WEB Based program
Bundle prices available for both web and CD programs. Supplemental materials also available.
Available in English, Spanish, and French
For students age 6 to 12 and those with learning differences
Keyboard Town Pals is a online program for elementary age students to learn typing skills and to type in one hour. The Keyboard Town Pals program is comprised of 8 lessons which build on each other.
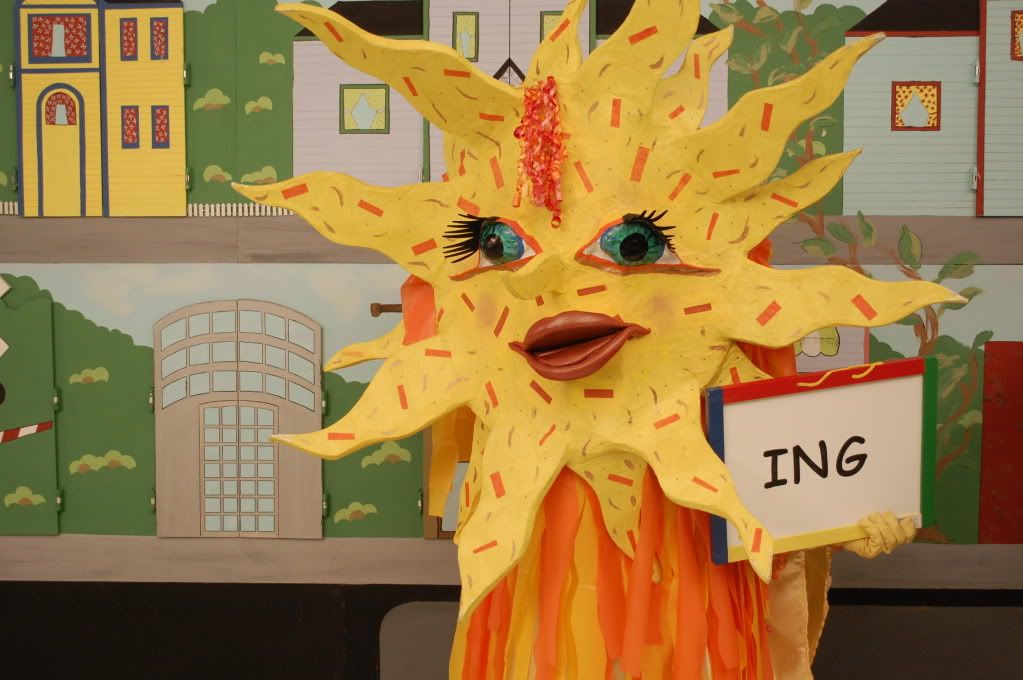
The lessons are taught in front of a cut out of a town where the buildings are arranged in the shape of a keyboard. Each building is a home for letter character you would find on the corresponding key. Living in the buildings is a puppet character whose name begins with that letter. Each character has its own house, except when fingers move to other keys in the middle of the keyboard, then these two characters share a house.
Keyboard Town Pals |
Each row of the keyboard is named.The row where fingers rest is called Home Street.The row above is "uptown", the row below is "downtown".
Sunny |
In addition to typing the letters they are also instructed to type simple words. What is typed shows up just below the 'instruction' screen so that the user is encouraged to watch what happens on the screen rather than where their fingers are.
In addition to the lessons,there is also supplemental material available under the heading 'virtual journal'. Here each lesson has an additional sheet which can be printed and the instructor can do with the child apart from Keyboard Town Pals. The virtual journal also gives the student the opportunity to email the Keyboard Town Pals character of their choice.
The Keyboard Town Pals website has a video describing the philosophy and methodology used in the program. Demos of the program are also featured on the site.
A brief assessment requiring the student to type the alphabet forwards and then backwards is also available.
Keyboard Town Pals does not use speed drills during the instruction and mistakes are not counted as well. Keyboard Town Pals offers a low pressure method of teaching keyboarding skills.
My thoughts about Keyboard Town Pals
Both of my children used the program. Neither of them was overly thrilled with it, but they did use it. My 7 year old did quite well and refreshed his typing skills. Keyboard Town Pals was the first typing instruction my 10 year old had. She was able to go through the lessons easily. She picked up some new skills, but did not spend a whole lot of time practicing, so I am not sure what she will take away from her experience with Keyboard Town Pals. I think my children would have been more interested in the program if they were younger.
Often the characters use words to help the user recognize the letters. When moving uptown from "K" to "I" the word "eyeglasses"is used. While this fits with the K character and is the appropriate sound for the word it is not proper for the spelling. Just as important as typing is being able to spell correctly when typing and if a child is lead to believe eyeglasses starts with "I" they may have difficulty with spelling this as well as other words with the same sound.
I reviewed the Web Based program and had difficulty receiving the necessary information to access Keyboard Town Pals. The people at Keyboard Town Pals were very friendly and helpful, spending additional time and effort to help me access the program.
I like having the material available in the virtual journal. By printing out the page for each lesson I was able to give my children some practice in a different voice and manner than they were used to from the program.
I also like the low key approach presented in Keyboard Town Pals. Timed tests add an element of pressure which increases anxiety and often causes the student to not do their best. Here there is no pressure to complete as assignment in a specified amount of time which allows the student to use and practice at their own pace.
An additional benefit to Keyboard Town Pals is having the delete button disabled. This eliminated the temptation to go back and fix mistakes instead of focusing on improving.
Learn what other members of the TOS Crew experienced while trying Keyboard Town Pals at the Crew Blog.
I received a free subscription to enable me to write this review. I have not been compensated in any other manner. All opinions expressed here are solely my own.
Monday, October 31, 2011
Homeschool Mothers Journal Weekly Review 10/30
In my life this week…
I am sewing a jumper for my daughter. I also tried to clean off some files from my computer as well old emails.
Continuing to go through things in the basement.
In our homeschool this week…
The children continued to work through the workbooks for NaNoWriMo and can't wait until they can start working on their stories.
Places we’re going and people we’re seeing…
We went to the local history museum for their homeschool day.This months theme was Numbers and Notes. Some of the activities included listening to a preview of an opera which will be performed later this year about a young man landing a job as a cowboy. We also learned how to and played a math game called Equations. This was challenging as there were 60+ people in the room and playing it as a large group.
We also learned some about the history of Shape Note singing and had the opportunity to practice this as well.
I think the best part of the whole day was having the opportunity to listen to Luthier and learn how he makes violins.
My favorite thing this week was…
A McRib and Coke at McDonalds.
What’s working/not working for us…
We are still struggling with notebooking and summarizing. I may drop most of it until the New Year.
Questions/thoughts I have…
I’m reading…
A photo, video, link, or quote to share…
This link will tell you more about Shape Note Singing.
http://fasola.org/
Thanks to Sue at The Homeschool Chick for hosting Homeschool Mothers Journal.
I am trying to figure out how to incorporate everything I would like to. We have done anything with our state study for months and I would like to study more Composers since both of my children enjoy music. I have had several books about Bach for weeks, but have barely touched them. I don't know how to get it all in.
I’m reading…
Love Finds You in Amana Iowa.
A photo, video, link, or quote to share…
This link will tell you more about Shape Note Singing.
Thanks to Sue at The Homeschool Chick for hosting Homeschool Mothers Journal.
Wednesday, October 26, 2011
C is for Cooking up Sentences
Are you thinking, "What kind of crazy recipe is this?, How do you cook a sentence?"
Well, it doesn't have much to do with recipes or cooking at all.Cooking Up Sentences is a game which reinforces parts of speech.At the beginning of play each person chooses a chef token and one of 8 recipes.LOTS of word tiles are separated into piles based on which part of speech they are and put around the board.While the recipes have titles of various yummy sounding baked goods, what you are actually making are complete sentences. Each recipe lists about 6 ingredients which are needed to make that item. The 'ingredients' are collected while moving around the board and landing on spaces which are labelled with a part of speech.Then you have to correctly identify which pile contains the part of speech on which you landed. If you are correct, then you get to choose a word from that pile.To make it self checking the spaces on the board match the colors on the back of the tiles. In other words, if the colors match then you get to keep the tile.
To win, a player has to use all the ingredients in his recipe and the proper quantity as well (Sometimes the 'recipe' calls for more than one of a certain part of speech). Additional parts of speech which have been collected during the game can be used as well. Sentences can be funny, but they do have to be grammatically correct. When a player has completed a sentence, they read it out loud, including ending punctuation and then name which part of speech each word is.Some of the sentences we have come up with have been hilarious.
Both my 7 and 10 year old enjoy playing the game, but I think my 7 year old asks to play more frequently.I enjoy it as well and have been known to make an occasional mistake, usually by accident. This totally delights them. Somehow, I usually get beaten by one of my kiddos. But I still enjoy playing.
I can't believe this is letter C already, the weeks just fly by. I didn't post the previous two weeks, because I wasn't sure what to right about and then by the time I had an idea, it was too late.Maybe I will have to write them anyway. Cooking Up Sentences for the letter C was actually my daughters idea.
Thanks to Dawn at The Momma Knows for hosting Homeschooling ABC's.
Monday, October 24, 2011
George Washington Carver His Life and His Work TOS Review
George Washington Carver His Life and His Work DVD
Marshall Publishing
1-888-300-3455
www.marshallpub.com
$19.95
Review Readers can use code: TOSC1 for a 15% discount at checkout
Marshall Publishing also carries a wide variety of history DVD's, as well as DVD's about animals and vehicles.
From looking at history books one conclusion I've drawn is that a number of them do not do a good job of tying history together for the reader. Events and people are discussed but if a person didn't have a direct impact on an event they are seldom mentioned in the text. Often they are just relegated to a sidebar consisting of several small paragraphs about their achievements. Thus the reader may come away with an idea of what the person did, but only a vague idea of where they fit in the whole puzzle of history. This is not the case with George Washington Carver, His Life and His Work.
George Washington Carver, His Life and His Work begins by setting the historical stage for Carvers life. He was born to a slave mother in Missouri towards the end of the Civil War and, along with his mother and sister were kidnapped. The man who owned his mother found him, but not his mother or sister, and brought him back to their home. There he was educated and eventually moved to other places in the Midwest to continue his education. After much hard work and personal contacts he ended up at Tuskegee Institute in Alabama. These facts are detailed in the presentation,thus his place in history is firmly established in the viewers mind. The viewer is able to appreciate all of Carvers' work and achievements in their historical context.
The video begins with nature and flower scenes accompanied by soothing music. While viewers see scenes from where Carver grew up the story of his childhood is told. As his life story is told, actual pictures of places and people comprise the video. The viewer also sees pictures of the actual lab which Carver and his students used. Photographs of Carver teaching and interacting with people are also plentiful in the movie. A fair amount of footage from Tuskegee Institute is also used.
A study guide and discussion questions are available after the description of the DVD.
My Thoughts about George Washington Carver, His Life and His Work
I was pleasantly surprised while watching this movie. I was not very impressed with the opening which consists of music playing and pictures of plants, but soon came to realize that was a fitting opening for the story of a man whose life was dedicated to plants.At several points it appeared to me there were actual clips of Carver himself talking or what was being said were things he wrote. I also really liked how the movie stuck to facts and did very little interpreting of those facts. I also liked how it was not cartoony, but solid history and facts. I think the presentation did an excellent job of making this part of history exciting and meaningful to the viewer. The program does a great job showing how Carver worked to get an education and did not stop but went on to use that education to benefit a great number of people. It presents the possibilities education and hard work bring to a person and community in a very positive light.
Several months ago we spent some time studying the state of Missouri and learned some basic facts about George W. Carver and his work. However, we could not find resources which went deeper than his teaching farmers to plant peanuts to restore nutrients depleted by years of growing cotton. This DVD tells so much more of his accomplishments. It is a beneficial resource and addition to studying the state.
I watched the movie with both my 7 and 10 year olds who appeared to enjoy and learn from the movie. My 7 year old particularly enjoyed seeing the cotton fields and plants. One thing which stood out for my 10 year old occurred when Carver was a young man and he met another person with the same name. So, according to the movie, he added the initial W. to his name to avoid confusion. She thought that was particularly clever.
They were also impressed by the fact that the only piece of real lab equipment Carver had was his microscope, which had been a gift before he went to Tuskegee. Upon hearing and seeing this they remembered seeing the microscope in a traveling exhibit at the history museum a while back.
This DVD presents the interesting story of a self motivated man who overcame obstacles and continually sought to help others by sharing his knowledge and skills.
Learn what other Crew members had to say about this DVD as well as other DVD's by Marshall Publishing & Promotions at the Crew Blog.
Disclaimer: I received a complimentary copy of this DVD in order to write this review. I have not been compensated in any other manner. All opinions expressed here are solely my own.
Say Anything Family Game TOS Review
Say Anything Family Edition by Northstar Games
northstargames.com
NorthStar Games produces several games for families and groups
Ages 8 and up for 3-6 players
Say Anything contains 6 playing boards, 12 tokens, a score board, a stack of question cards, dry erase pens and a Select-O-Matic 6000 which all fit into cavities in the tray in the box. The playing boards and score board are all dry erase. The boards and tokens are color coded with each player receiving the same color of board and tokens.
To play, a judge is selected and given the Select-O-Matic 6000. They then read the question outloud and the other players write their answer on their dry erase playing board. After all players have written their answer, all players place their tokens on the answer or answers they think the judge may pick. The judge then shows which answer they like best by pointing the arrow on the Select-O-Matic 6000 to the color of the board with their chosen answer. Points are awarded based on judge selection of the answer and token placement. The next round begins with a new player taking over the role of judge and the former judge now writing an answers.
Our Thoughts about Say Anything
My 7 year old says:
"This is a cool game.I like writing down hilarious and crazy answers. It is a lot of fun."
My 10 year old says:
"I really like this because it allows you to write what ever you think about the question of what you think the judge might say. I like being the judge too, because I get to pick the one I like best.Sometimes picking one answer is hard because they are all good, but that is part of the fun."
Although all of these things about Say Anything Family are great, I think the best part are the simple, uncomplicated directions. We found the directions to be very easy to understand and then we could get right to playing the game. We didn't have to try to figure out what was meant or decipher anything. After setting everything up we were playing in less than five minutes. That's great. I really like games where set up and reading the directions doesn't take as long as actually playing the game.
One thing I like is the choice of questions on each card.Sometimes one of the questions maybe about a topic the kiddos aren't familiar or require explanations, but with multiple questions it is easy enough to choose another question on the same card.
Playing on dry erase surfaces is also very nice.I like not having to find paper in order to play or having all the used pieces of paper laying around when the game is over.
We also found that it is more fun to play with 4 people rather than just 3. Since one player doesn't write answers in a round, having more answers to choose from made play more interesting. It also avoided hurt feelings when a parent was the judge. Judge wasn't playing favorites then. (wink)
Neither my 7 or 10 year old had any trouble playing although we ran into several questions which weren't the most appropriate or that the 7 year old did not understand.It was also a game which my husband seemed to enjoy playing with us.
Although all of these things about Say Anything Family are great, I think the best part are the simple, uncomplicated directions. We found the directions to be very easy to understand and then we could get right to playing the game. We didn't have to try to figure out what was meant or decipher anything. After setting everything up we were playing in less than five minutes. That's great. I really like games where set up and reading the directions doesn't take as long as actually playing the game.
I recently reviewed Wits and Wagers Family, also from NorthStar Games.Check out my review here.
Other members of the TOS Crew also reviewed Say Anything. See what they had to say at the Crew Blog.
Disclaimer: I received a free Say Anything game in exchange for this review.I have not been compensated in any other way.All opinions expressed here are solely my own.
Subscribe to:
Posts (Atom)